> ## Documentation Index
> Fetch the complete documentation index at: https://developers.explorium.ai/llms.txt
> Use this file to discover all available pages before exploring further.
# Snowflake integration
> How to setup an integration to import and export data to and from Explorium.
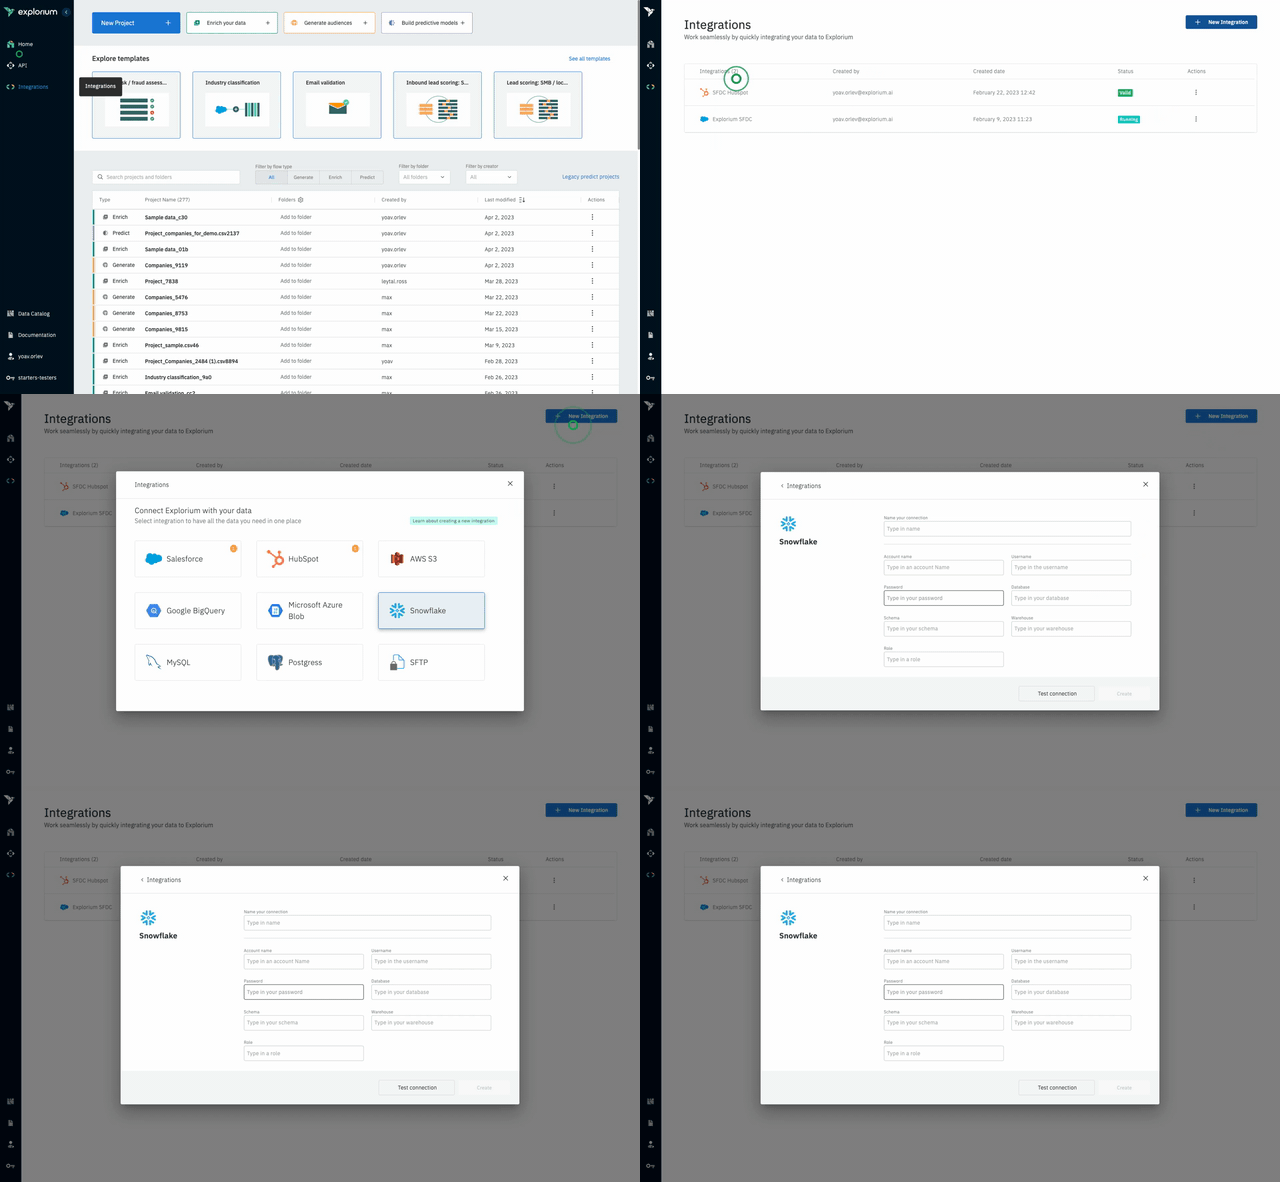
## Open the snowflake integration modal
To open the snowflake integration modal:
Go to Explorium Integration page
Click new Integration
Choose Snowflake
 ## Inserting credentials fields
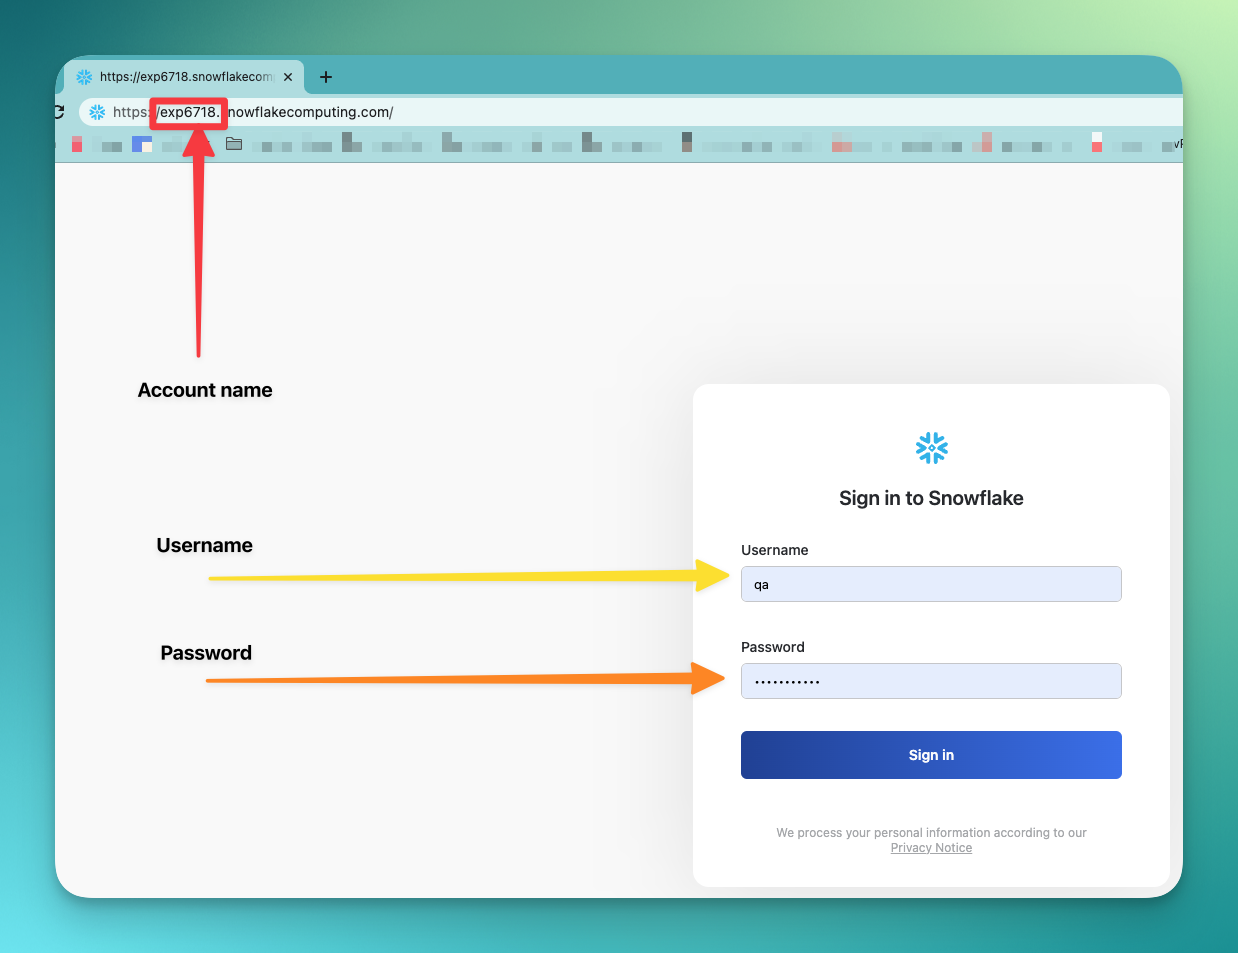
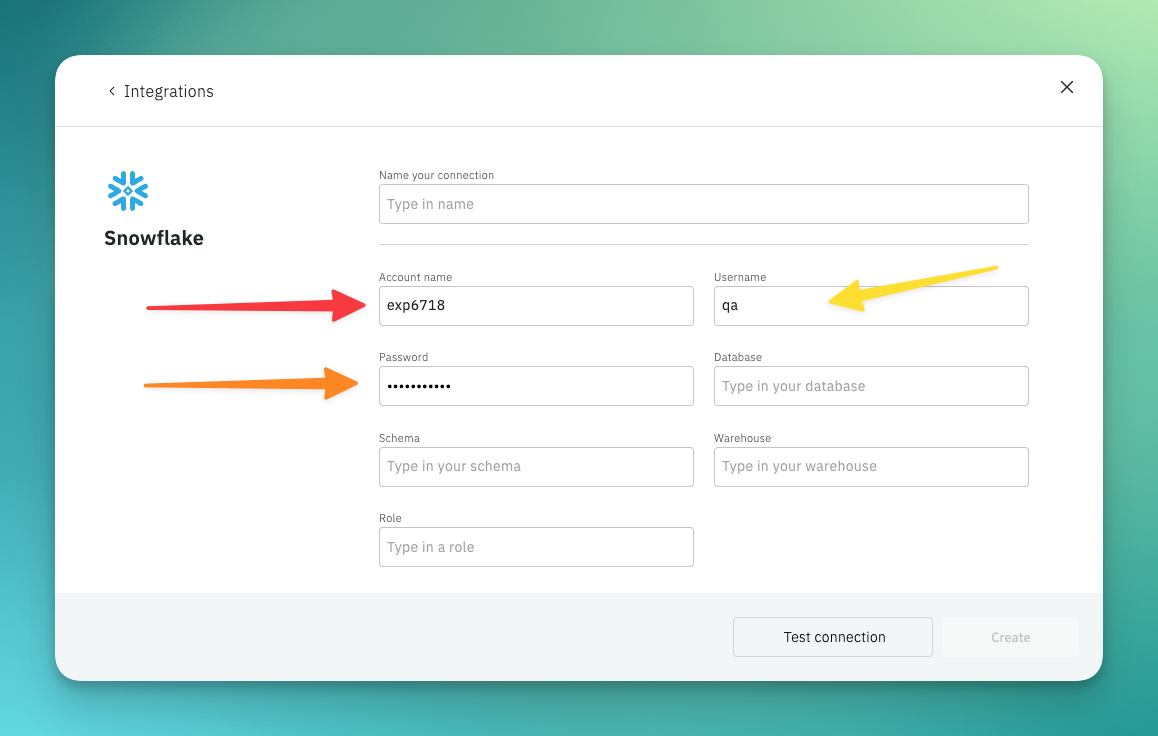
The first 3 fields we need to fill out are the
* Account name
* User name
* Password
These are the field that are required to log into your snowflake account.
## Inserting credentials fields
The first 3 fields we need to fill out are the
* Account name
* User name
* Password
These are the field that are required to log into your snowflake account.
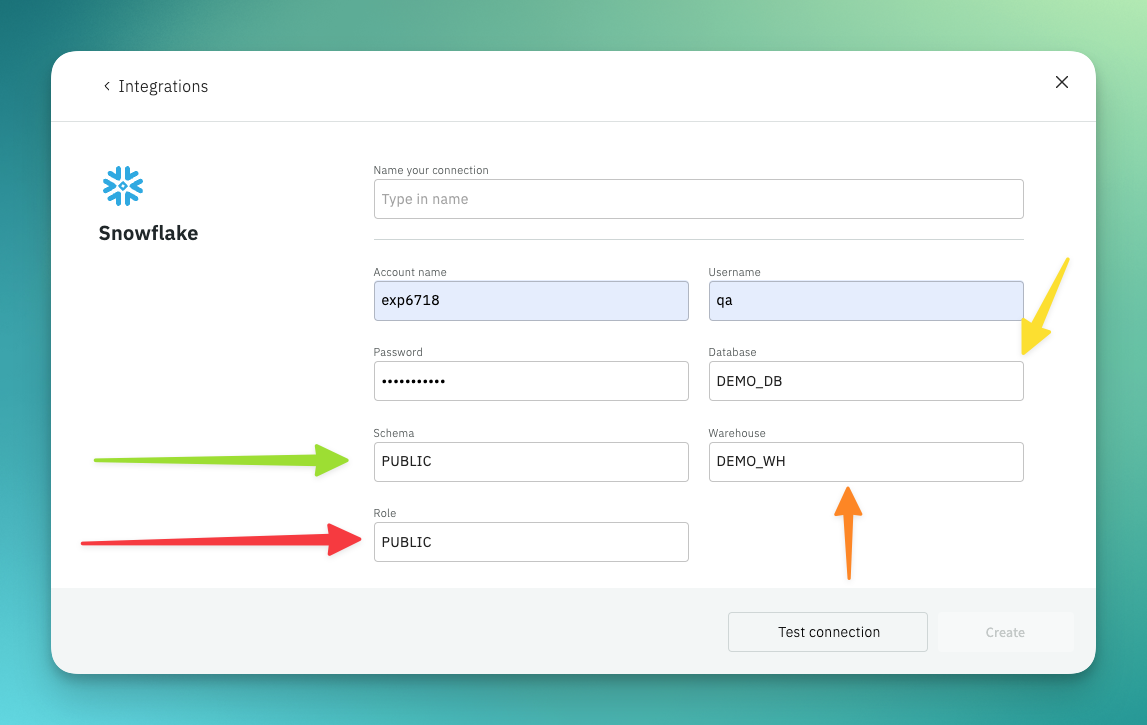
 ## Inserting data base fields
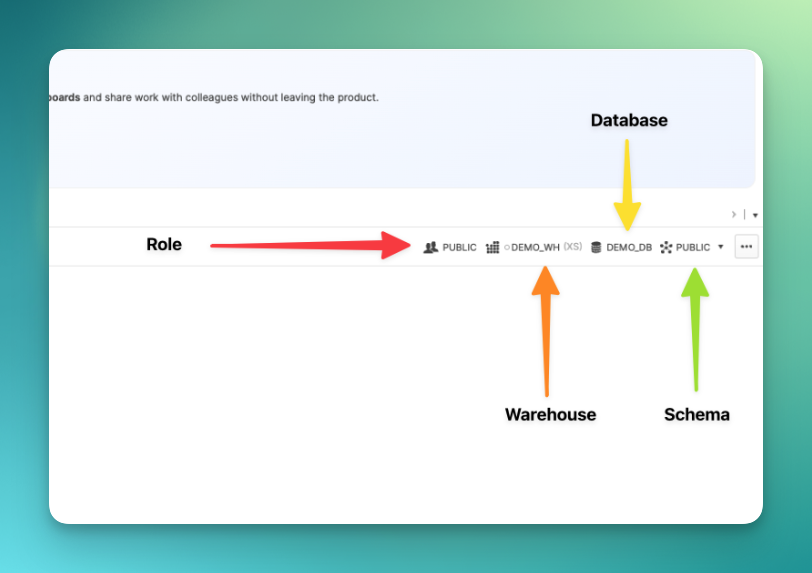
The next fields are required to access a group of tables:
1. Database
2. Schema
3. Warehouse
4. Role
In order to get the view below perform the following steps:
Log into your snowflake account
Choose a table from the schema you would later on want to either pull or push data to.
## Inserting data base fields
The next fields are required to access a group of tables:
1. Database
2. Schema
3. Warehouse
4. Role
In order to get the view below perform the following steps:
Log into your snowflake account
Choose a table from the schema you would later on want to either pull or push data to.
 ## Setting up the integration
Once all fields are filled out click the `Test connection` button. If the all goes all you will be prompted with the `Connection successful` message.
Click Create and your all done!
## Setting up the integration
Once all fields are filled out click the `Test connection` button. If the all goes all you will be prompted with the `Connection successful` message.
Click Create and your all done!