NoteThe selected report cannot exceed 2000 records otherwise the information cannot be synchronized.
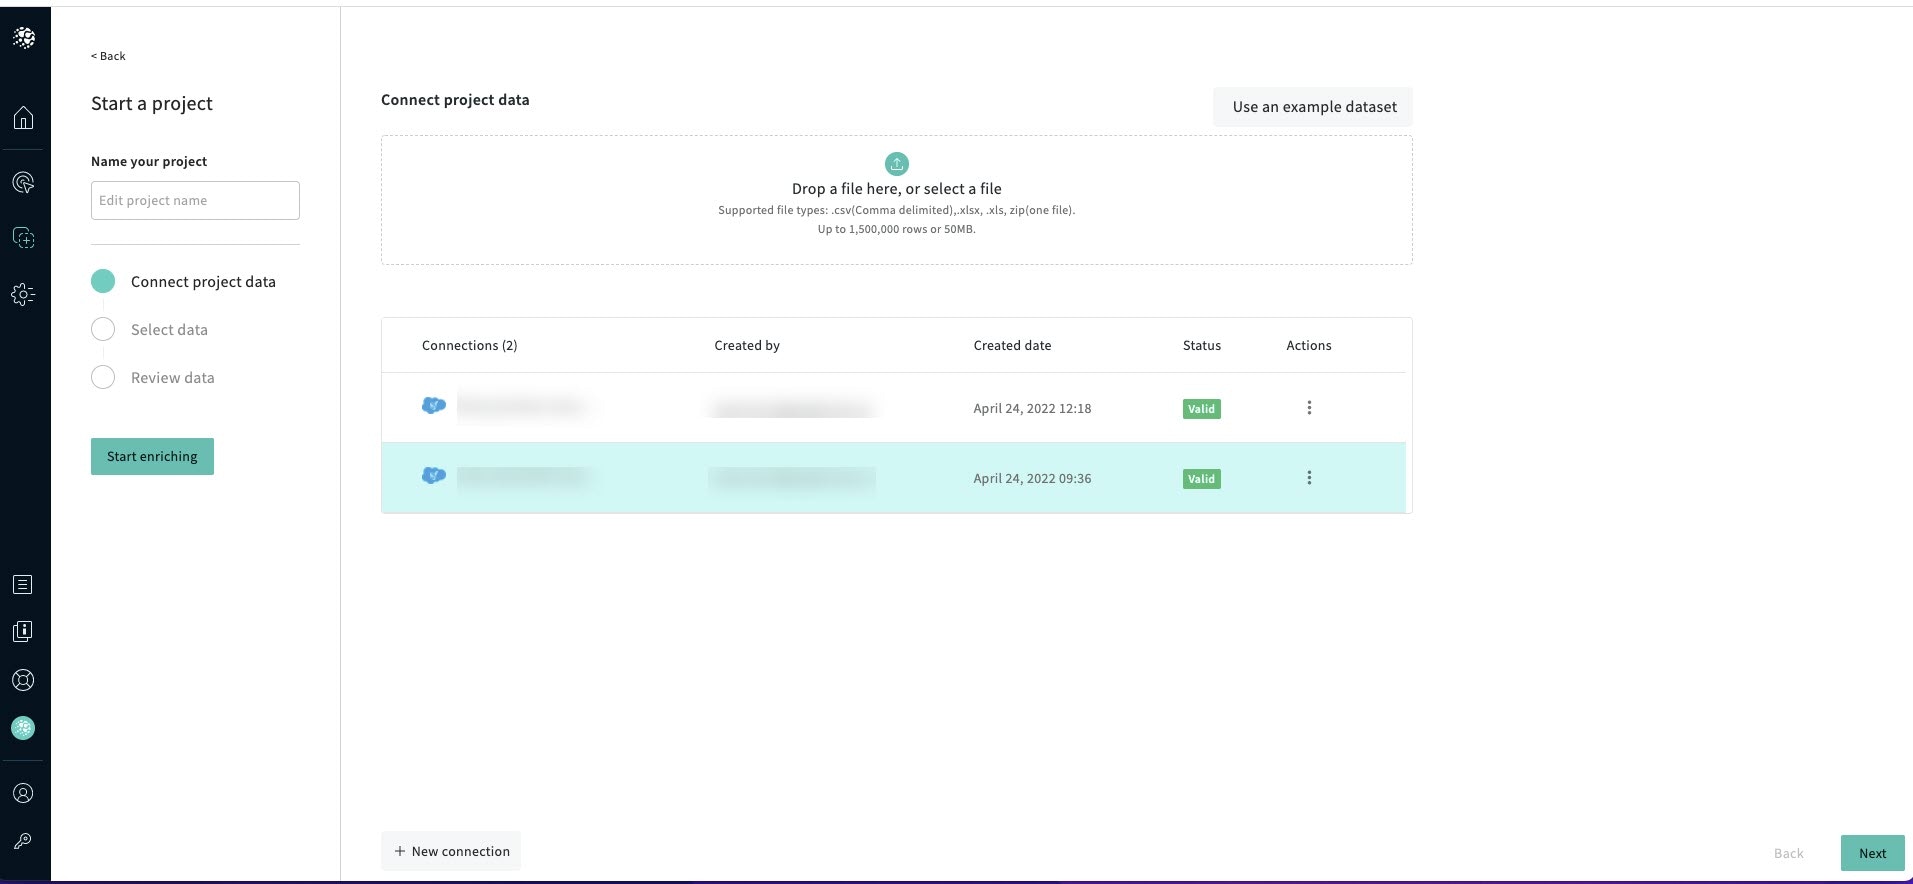
Once you have created and connected to your salesforce connection
Click Next
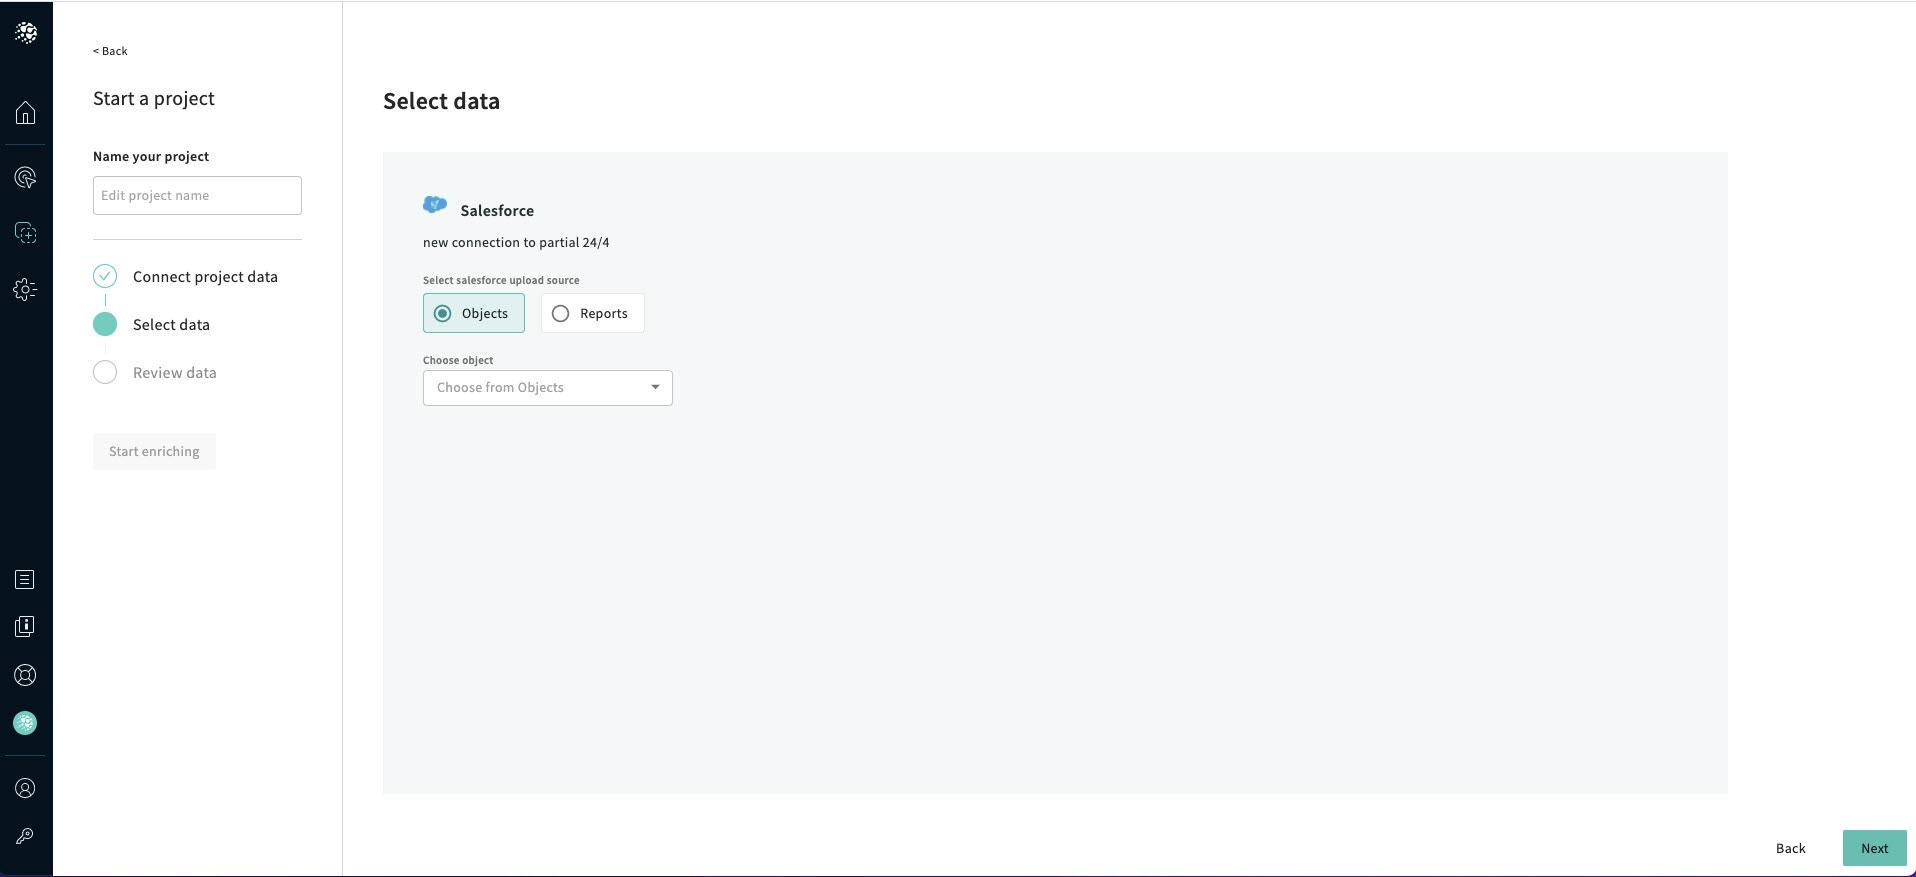
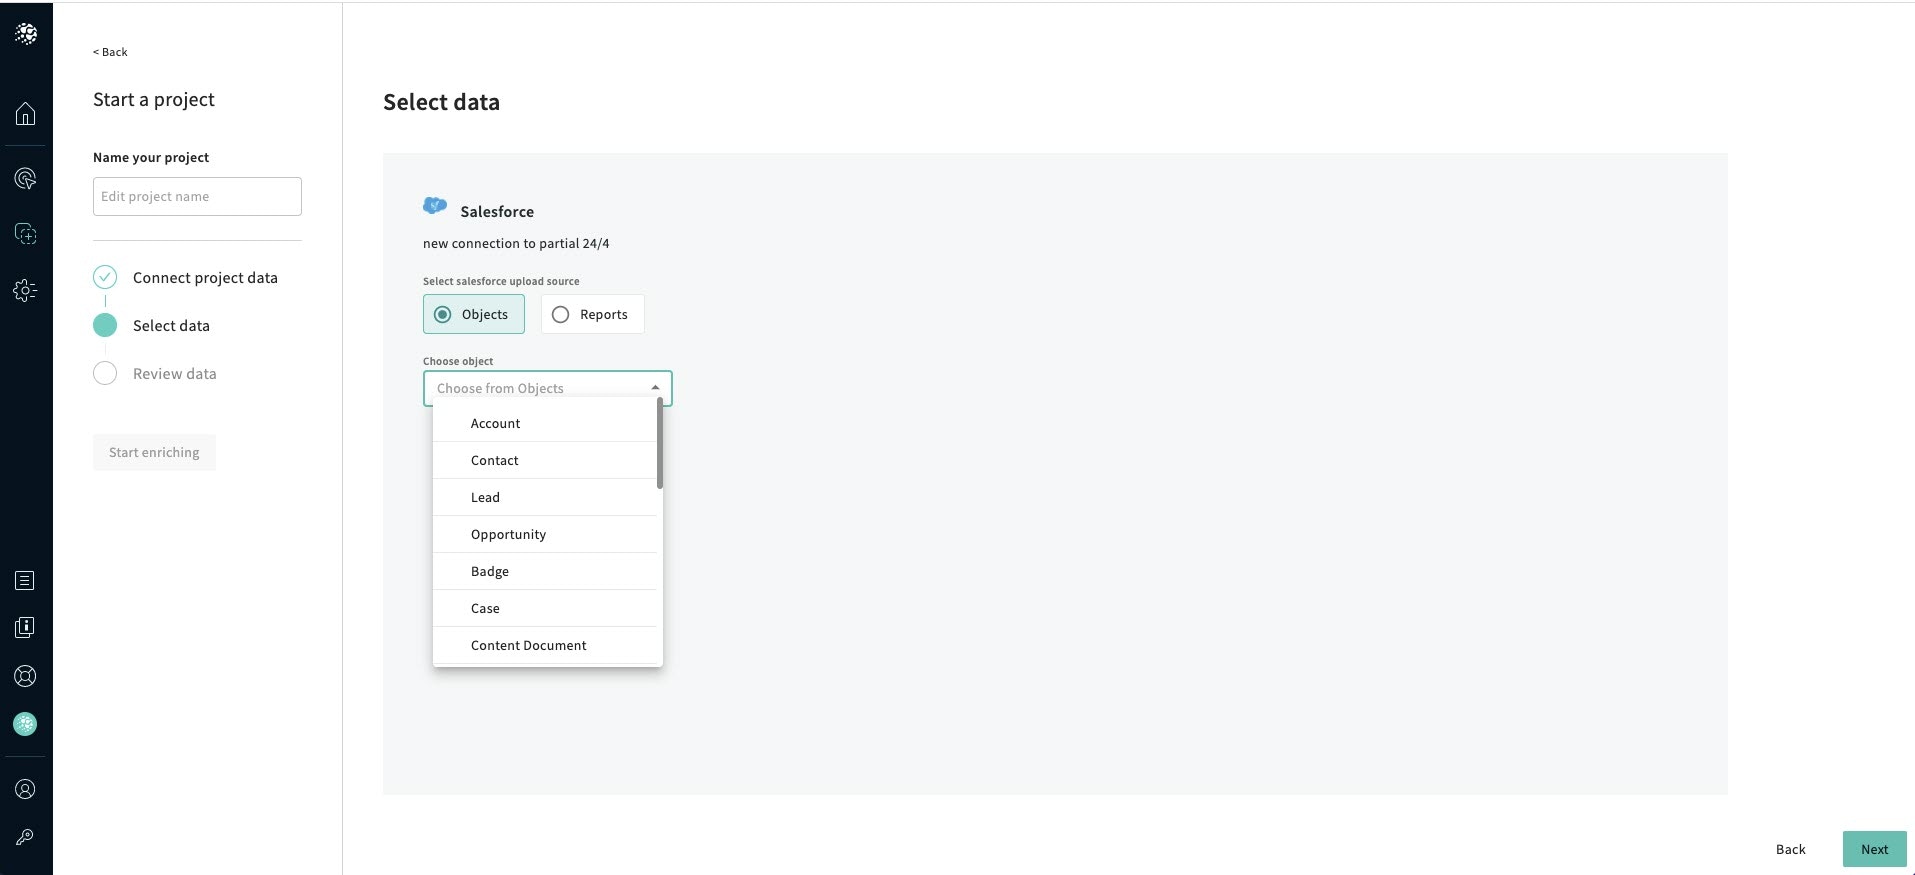
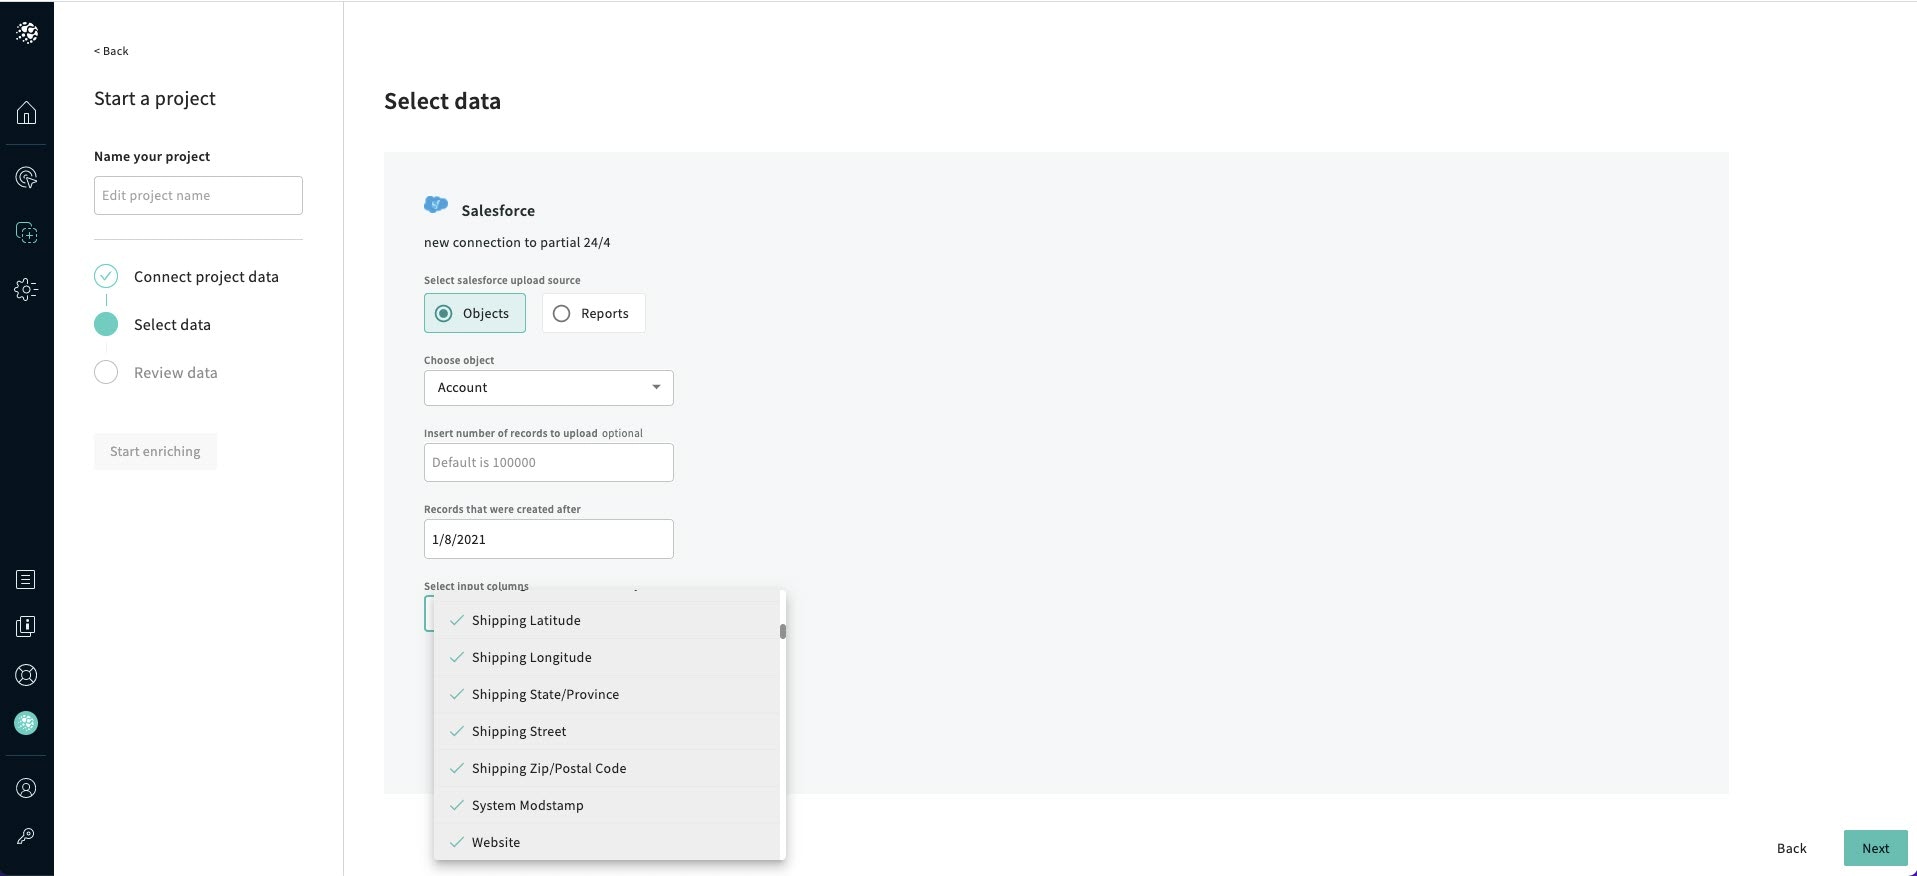
The Select data screen is displayed. Choose an Object from the drop-down list
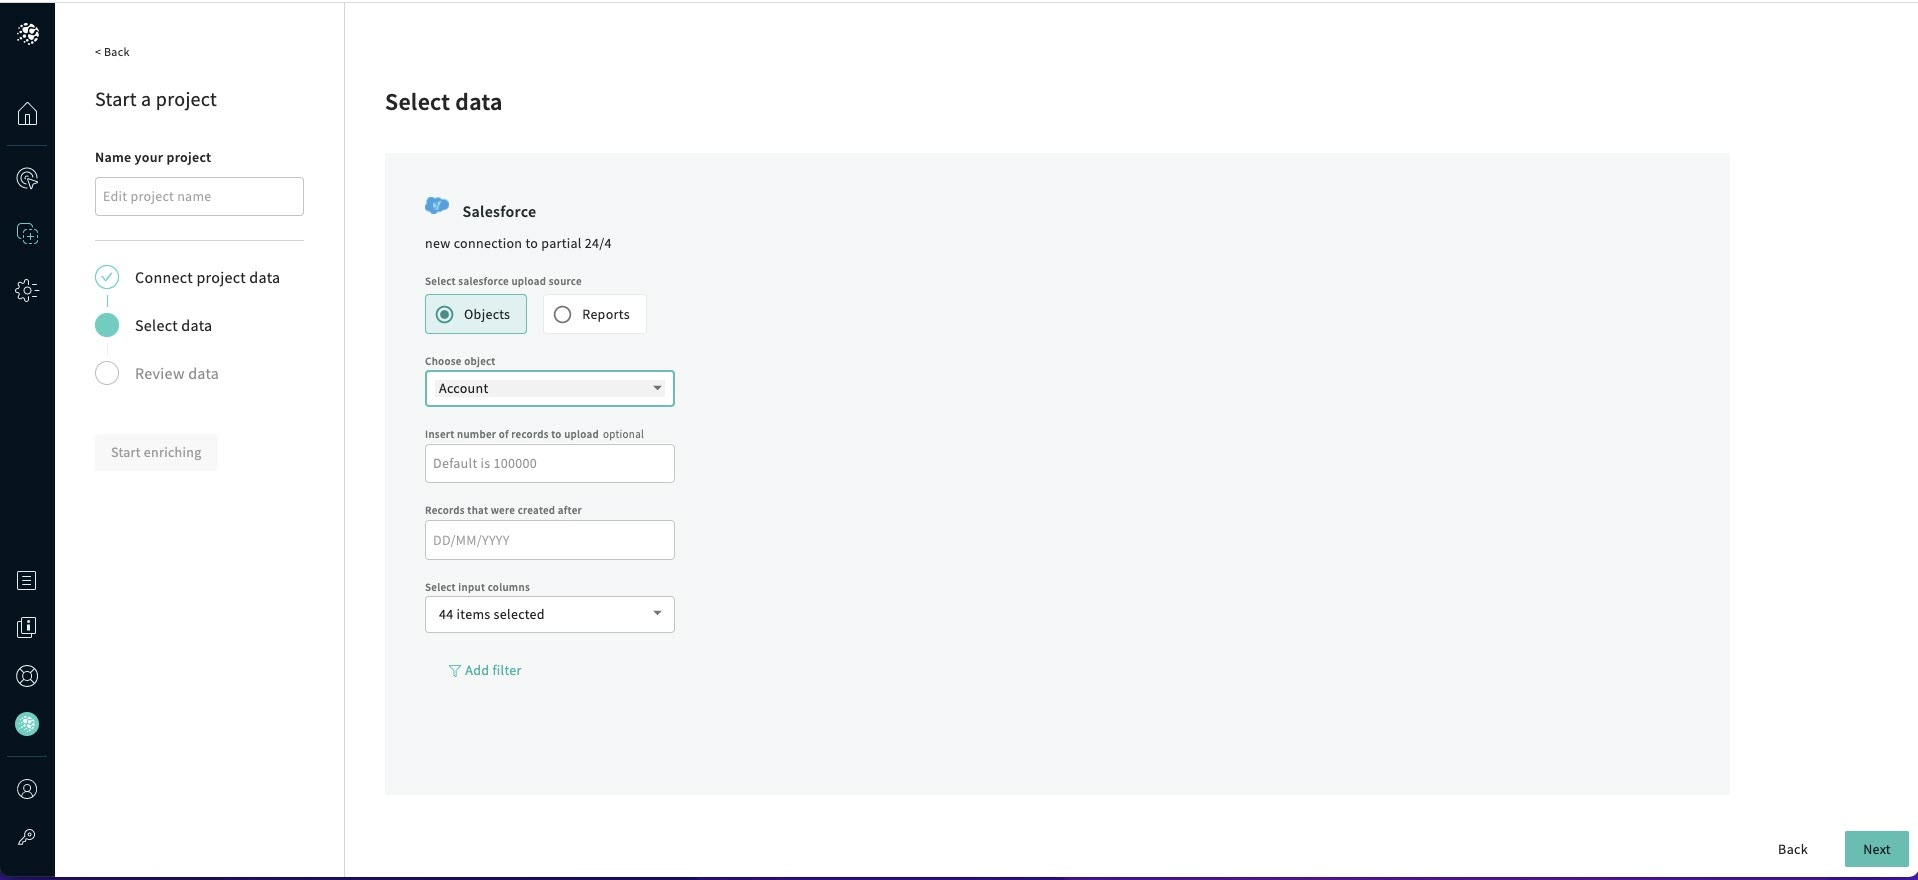
Insert the number of records to upload which is optional
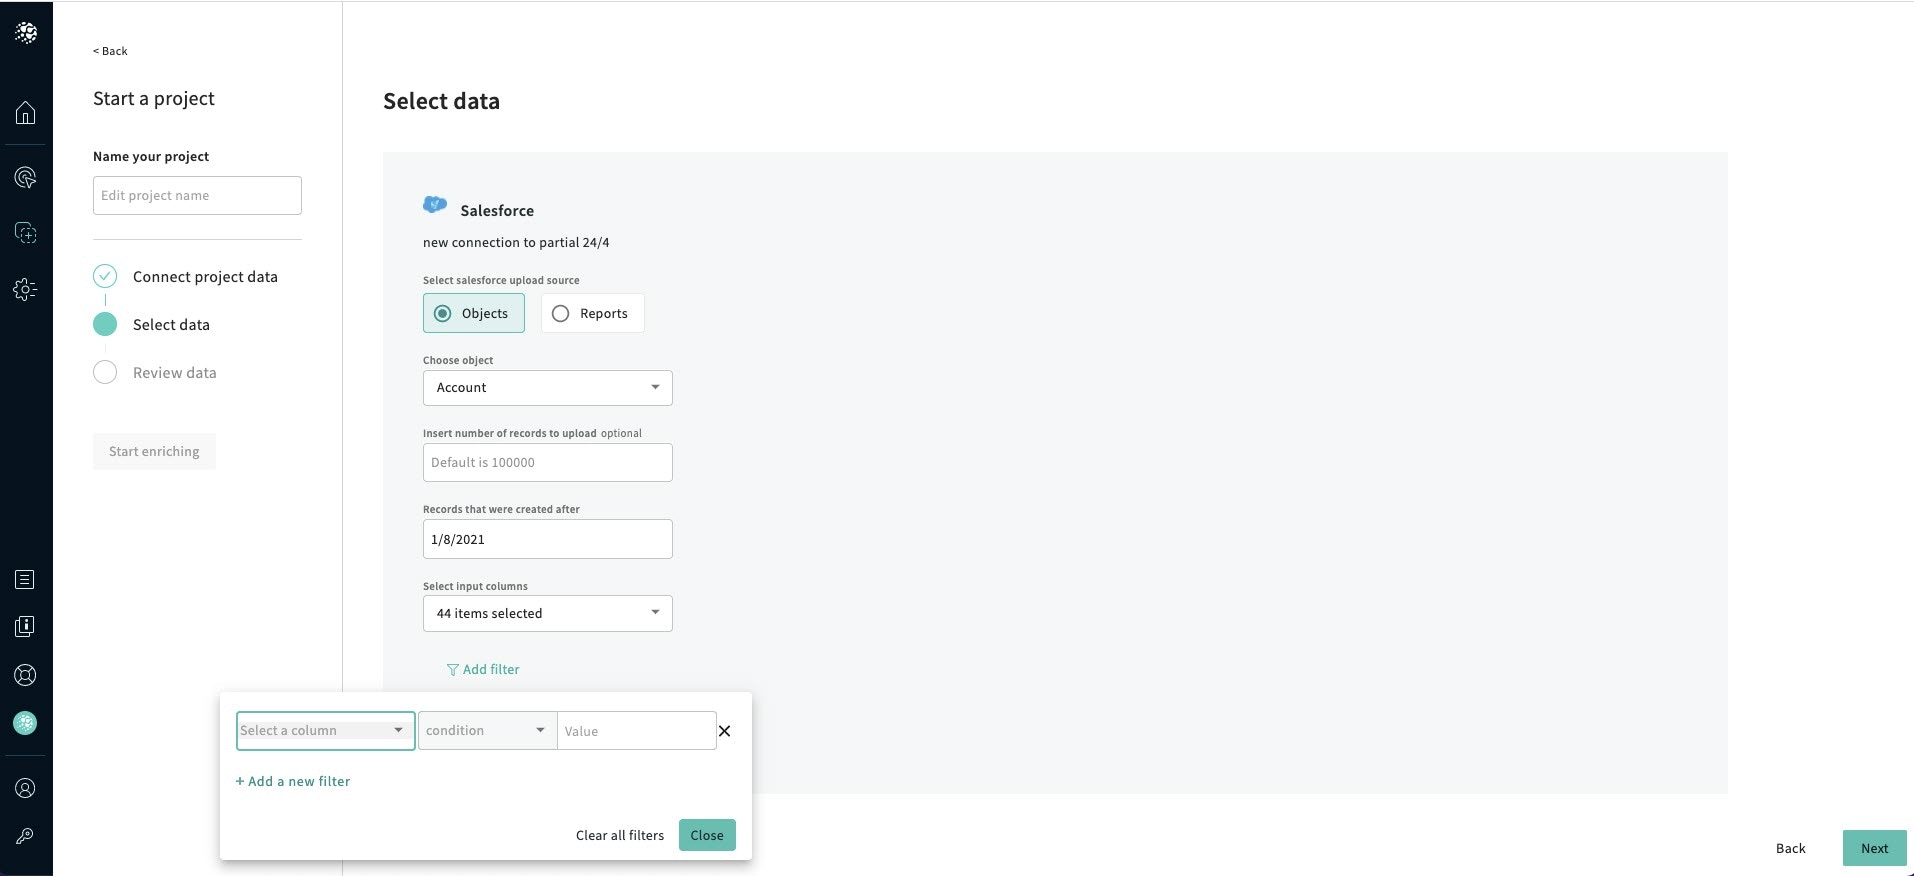
Click Close, and click Next, and the Review Data screen is displayed.