Introduction
Zapier is a powerful automation tool that allows you to connect our service with hundreds of other apps. With Zapier, you can create automated workflows called “Zaps” that transfer data between different applications, saving you time and reducing manual effort.Getting Started
1
Accessing Zapier
Navigate to Zapier and either log in to your existing account or create a new one.
2
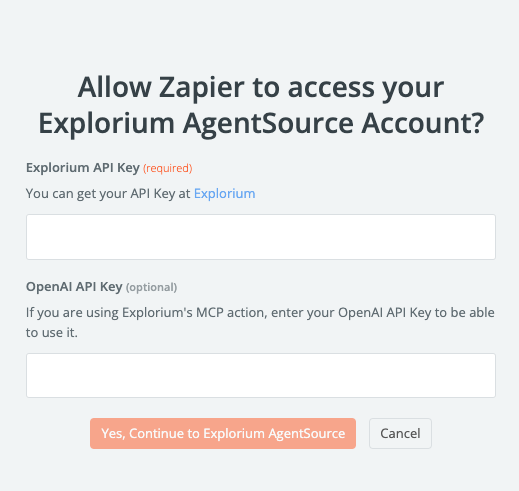
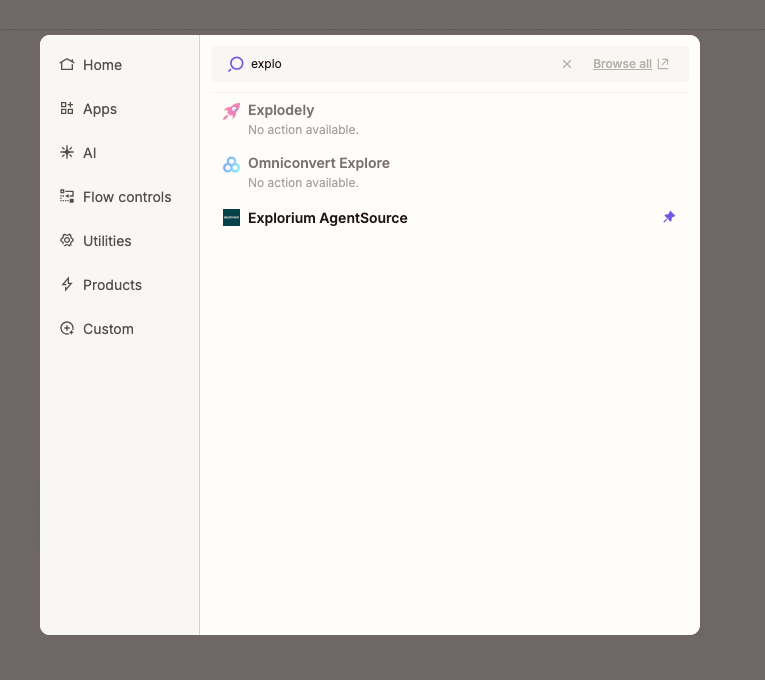
Connecting Our App
Search for our app in the Zapier app directory and connect your account using the provided credentials, click on the account field:
3
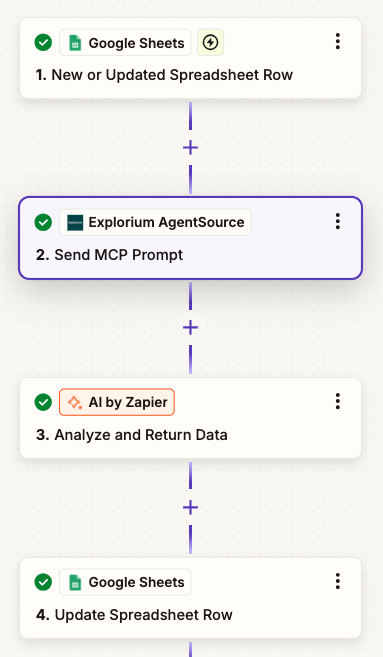
Creating Zaps
Begin creating your Zaps by selecting a trigger from our app and an action from another app (or vice versa).
To use Explorium’s API click on the zap box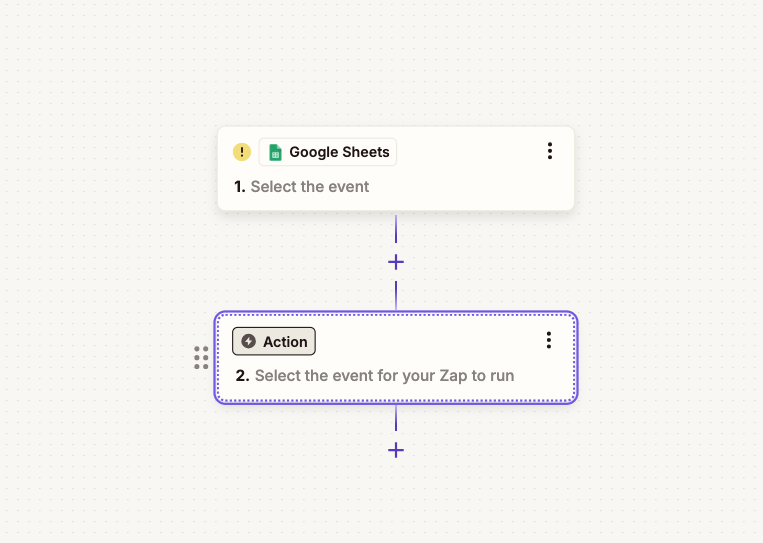

Triggers
Triggers are events within our application that can initiate a Zap. The following triggers are currently supported:- New Item Created: Triggers when a new item is added to your account.
- Item Updated: Triggers when an existing item is modified.
Actions
Actions are tasks that Zapier performs in another application when a trigger occurs. The following actions are available:- Fetch:
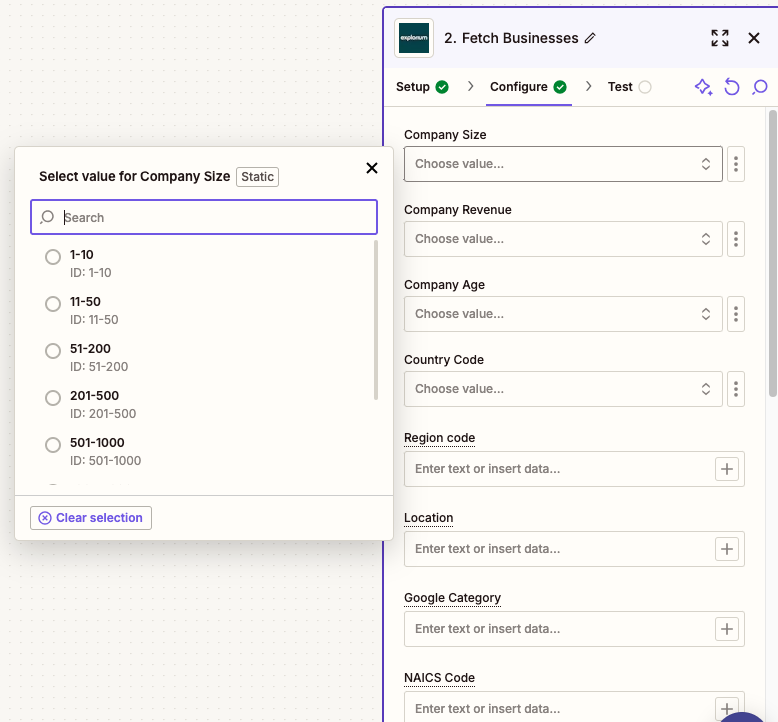
We have 2 Fetch actions - businesses and prospects, in each fetch business you can fill the different fields, some are dropdowns, some are free values with a certain pattern listed, the first few fields which have limited values, are dropdowns with fixed values (eg. company size, age, revenue, etc), other fields are free text but with a format stated when hovering on the name (NAICS, category fields, etc.)
- Output:
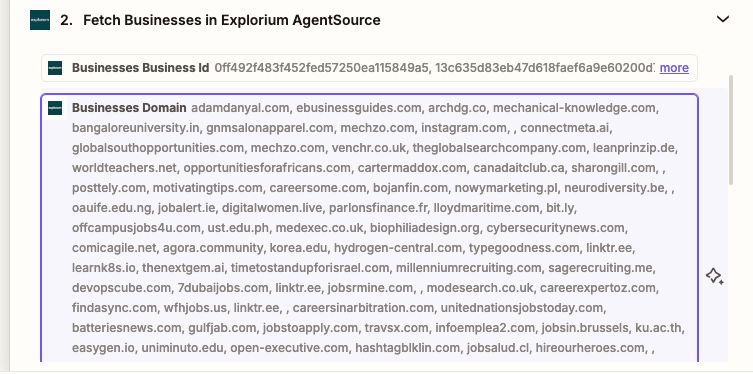
The output on fetch actions is with line items, meaning each field getting back from the fetch api has all the values returned in an array, so for example, if you got 10 results, each field will have all the 10 results by the order it got them.
- Match:
There are 2 Match actions, for businesses and prospects
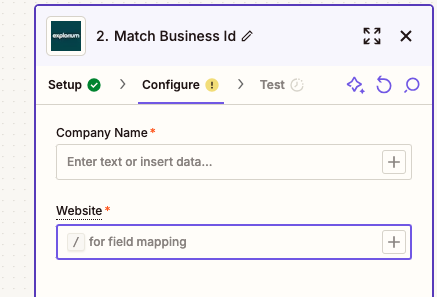
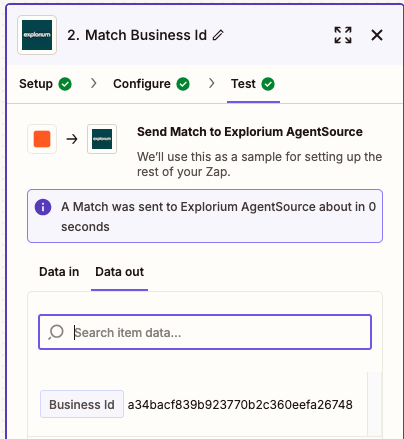
- Output:
The output for the match actions will be one field which is the matched id
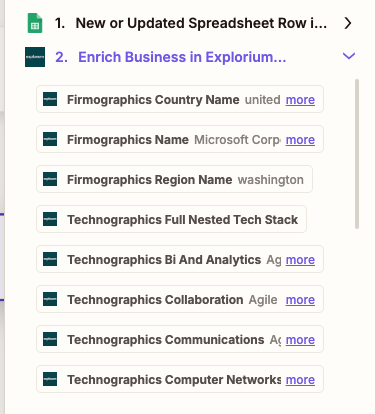
- Enrich:
Each of the enrich actions can get either a matched id, or the same inputs as matching, if given the same inputs as matching (For example email in prospecting or company name and website in businesses) it will match before enriching, if given a matched id it will skip matching and enrich, all the fields are optional but it is required to insert at least one of the above. Each enrich action has a dropdown to choose which enrichments you want to enrich.

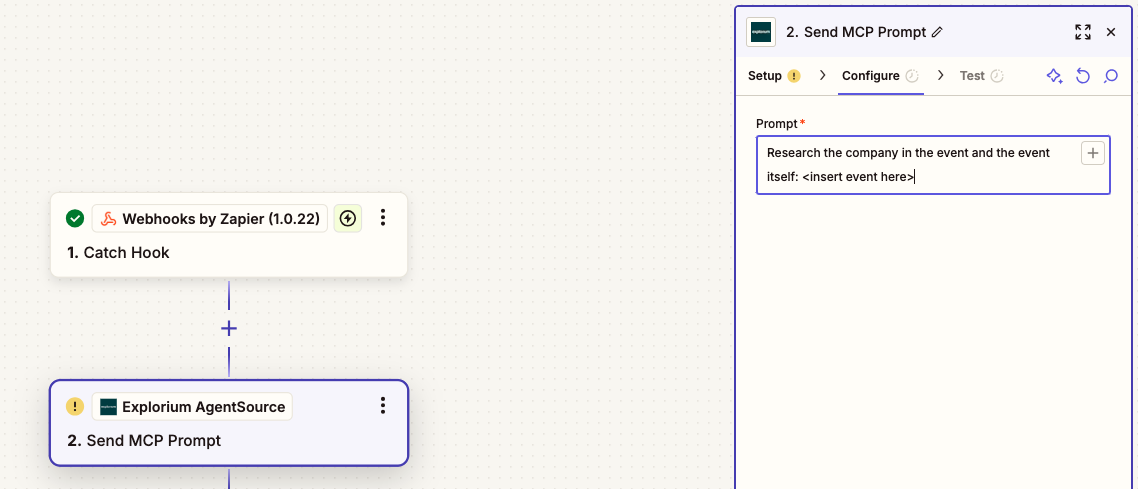
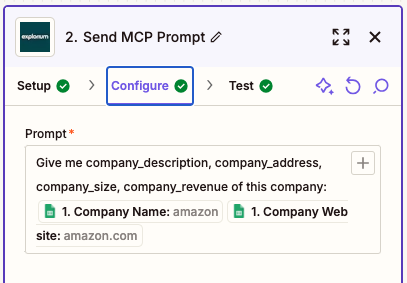
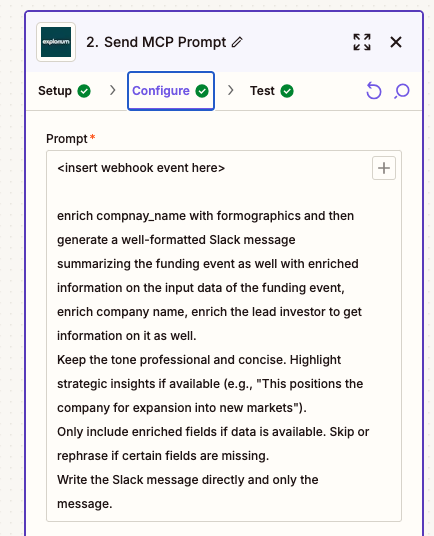
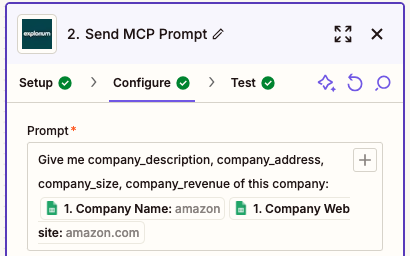
- MCP:
To use Explorium’s MCP we are using an Endpoint that you can write to the mcp, and get a response
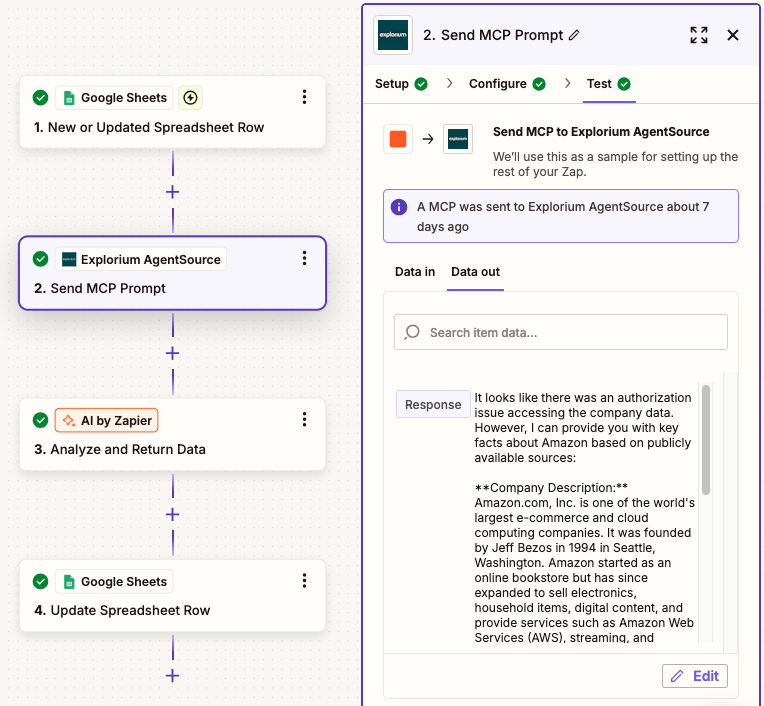
- Output:
The output for the mcp prompt will be one field - Response, you can use the response as it is, or use one of zapiers actions to extract data or filter data out of it, here is an example output and how to use it in zapier:
Templates
Templates are ready sets of actions that can be copied and used by one click. Each template can be used to create a zap, after using a template the user can change any action or any of the fields. Example of a templates: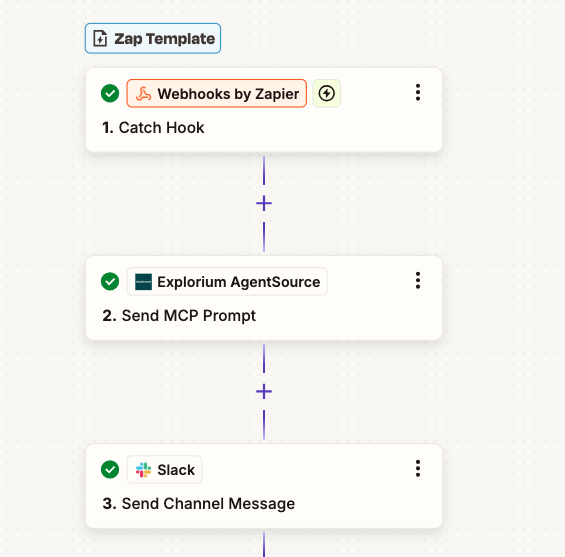
Using Webhooks
Introduction to Webhooks
Webhooks: Webhooks are automated messages sent from an application when a specific event occurs. They are used for real-time data communication between different systems, allowing one application to notify another about an event as it happens, rather than relying on periodic polling.Prerequisites
Before starting, ensure the following are in place:- Active Zapier account.
- Access to our API documentation and necessary API keys/tokens. https://admin.explorium.ai/
- Understanding of the specific API endpoints and data structures relevant to the integration.
Creating a Webhook Zap in Zapier
Setting up the Trigger (Webhook)
1
Log in to Zapier
Navigate to your Zapier dashboard and click “Create Zap.”
2
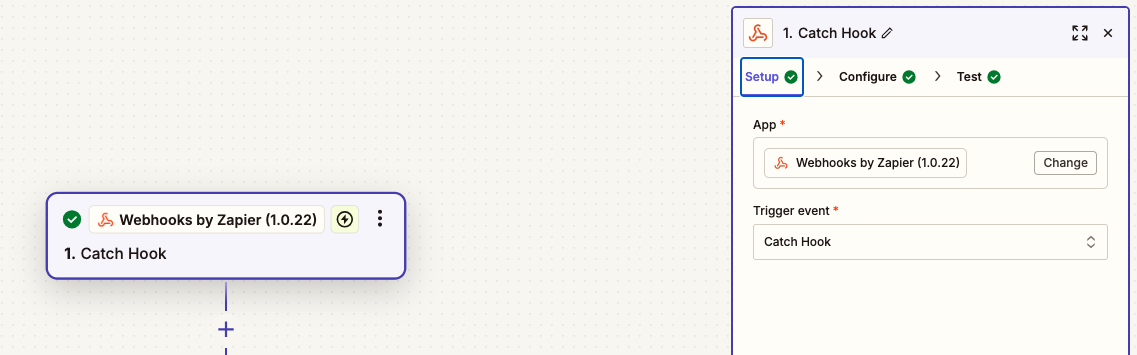
Choose App & Event
Search for and select “Webhooks by Zapier” as the trigger app.
3
Choose Trigger Event
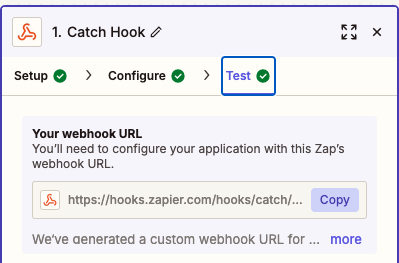
Select “Catch Hook.”
4
Customize Hook
- Copy Webhook URL: Copy the provided Zapier Webhook URL. This URL will be used to send data from our APIs.
- The url to connect the webhook is present in the “Test” tab:
Configuring Our API to Send Data to the Webhook
The webhook api docs: /reference/webhooks1
Follow the guide at Explorium documentation for webhooks.
2
Configure Webhook
Take the url from the webhook action in zapier, and use it in “webhook_url”, the partner id can be visible in the admin app topbar.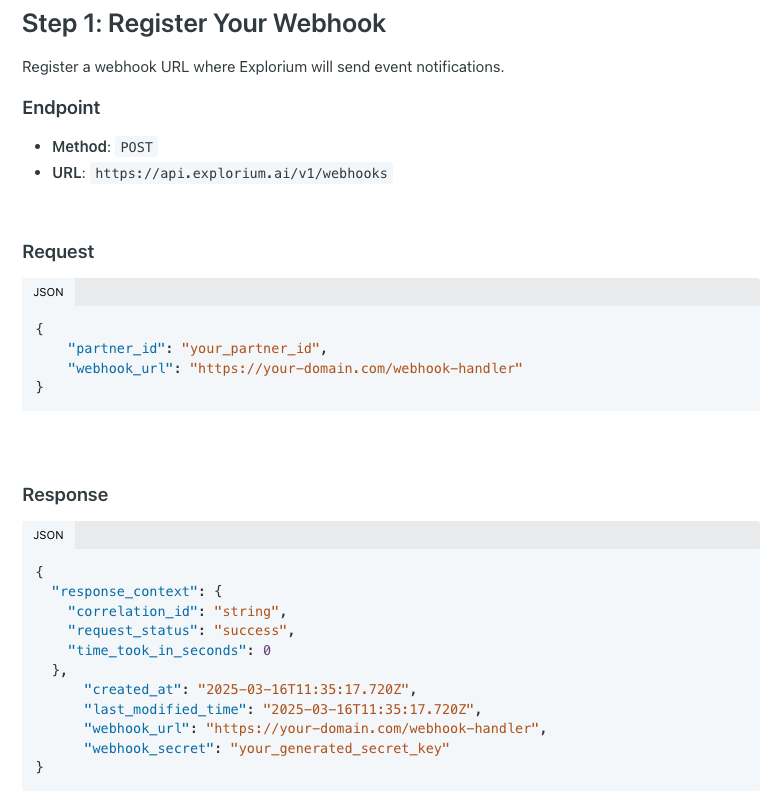
3
Enrolling events
After setting up the webhook, enroll into the events you would wish to accept, this can be done with this api: /reference/businesses/events/add_businesses_enrollments Here is an example call for that endpoint: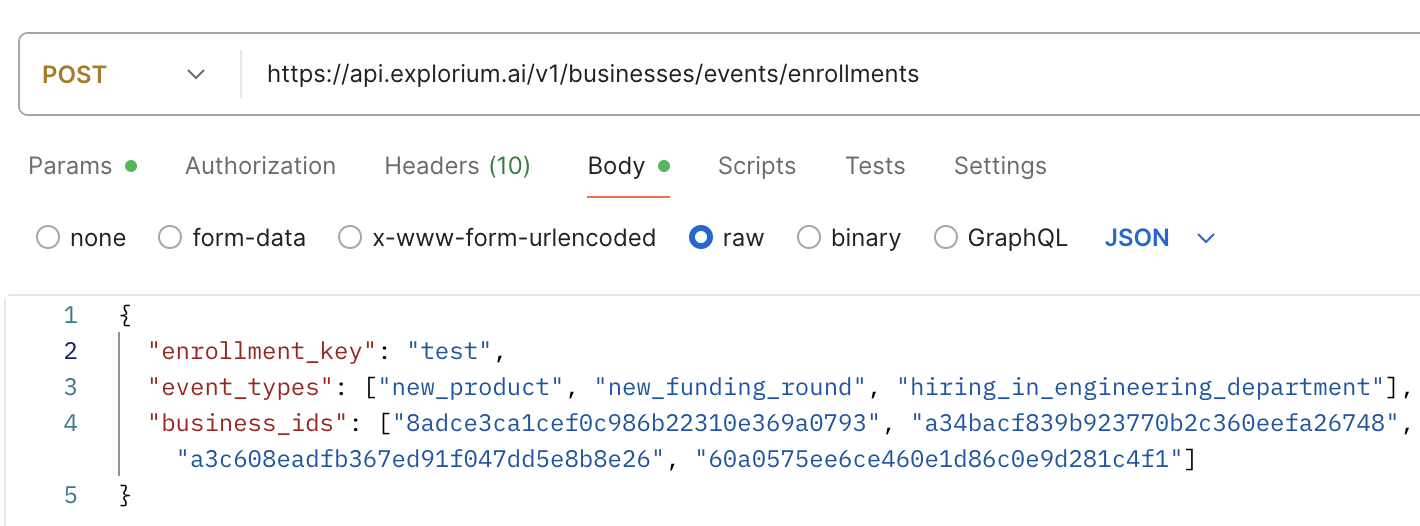
Setting up the Action (Integrating with Other Apps)
1
Choose Action App & Event
Select the desired application (e.g., Google Sheets, Slack, CRM) and the specific action event (e.g., Create Spreadsheet Row, Send Channel Message, Create Contact).
2
Choose Account
Connect your account for the chosen action app.
3
Set up Action
Map the data received from the Webhook (from “Catch Hook”) to the fields required by the action app.